
 Hack The Box
 Try Hack Me
 Medium
 ExploitDB
 0day
0day
Create your own log-free VPN
Preface
Welcome to the tutorial on how to create our own log-free VPN by setting up an OpenVPN server on a cloud machine.
Before starting with the tutorial, you must create a machine in the cloud, for this tutorial, we have chosen to use a DigitalOcean VPS with an Ubuntu 20.04 machine, which has a cost of $5 per month, through the following link you can get $100 for free.
Creating a cloud machine
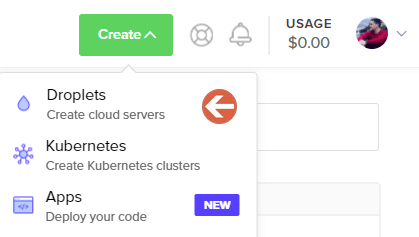
As I mentioned at the beginning, I have chosen DigitalOcean as VPS, but there are others like Linode, Azure or AWS. To create an Ubuntu 20.04 machine we must go to the top right of our panel and select Create -> Droplets.
We will choose the following image with the cheapest plan (Ubuntu 20.04 for 5$ per month, remember you get 100$ free if you use my link). We can also choose the location of our server, in my case I will use Frankfurt (Germany) and create credentials for the root user.

Generate SSH keys
In the previous step, we created a password for the root user, but using unencrypted passwords to log in to our machine is not a good idea since they can be exposed on the network because they are not encrypted. Therefore, we will generate keys so that only machines that have them (and the password) can log in.
We can generate the keys in the following way:
- Windows (with Powershell):
PS C:\> Add-WindowsCapability -Online -Name OpenSSH.Client*
- Linux and Mac:
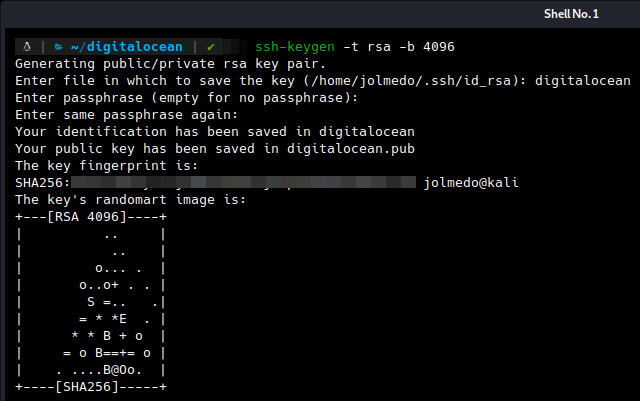
ssh-keygen -t rsa -b 4096
Login to the server and update
We log in to our server, remember that you can see the IP of your machine in the DigitalOcean main panel.
ssh root@[IP]
Enter the password you specified when creating the machine and execute the update commands.
apt-get update && apt-get upgrade
Create a user
Although the root user allows us to perform any action on the machine, it is not recommended that it be SSH enabled, therefore, we will create a user with permissions to use sudo and bash as the default shell.
useradd -G sudo -m jolmedo -s /bin/bash
Then we will create a password.
passwd jolmedo
Copy SSH keys to the server
In this step, we are going to copy the SSH keys generated from the previous step to our cloud machine.
- Windows (with Powershell):
type $env:USERPROFILE\.ssh\id_rsa.pub | ssh IP "cat >> .ssh/authorized_keys"
- Linux and Mac:
ssh-copy-id jolmedo@[IP]
Disable password authentication and security settings for SSH
Once we have the SSH keys on the server, we will proceed to disable password authentication and enable public key authentication. Edit the sshd file
nano /etc/ssh/sshd_config
First of all, let’s change the default SSH port, you can use any port (I will use 22022), this will help to prevent scanners from trying to login to our server with default credentials.
# Port 22
Port 22022
Disable password authentication (you can only log in with public key).
PasswordAuthentication no
Disable root login.
PermitRootLogin no
Finally, we restart SSH to apply changes.
systemctl restart sshd
OpenVPN Configuration
Here comes the highlight of the tutorial, configuring OpenVPN can take some time (installing packages, generating keys, configuring IPTables, generating configuration files, etc), but thanks to the work of a GitHub user, we can do it in a very simple way.
First, download the repository.
git clone https://github.com/Nyr/openvpn-install.git
We position ourselves in the directory.
cd openvpn-install/
Run the script.
sudo bash openvpn-install.sh
NOTE: Whenever you download any script, make sure there is nothing suspicious in it.
Once executed, we only have to answer a few questions.
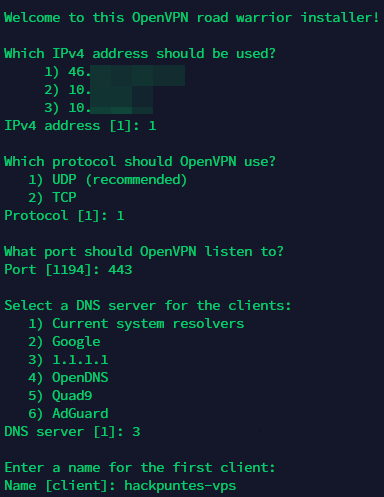
If you have noticed in the previous screenshot, I have changed the OpenVPN default port to 443, this is because some networks may block that port. I have decided to use 443 (the same as HTTPS) and you may wonder that this may cause some problems but, while HTTPS uses TCP, OpenVPN uses UDP, therefore, there will be no conflict between them.
After answering the questions, the installation process will begin. When it finishes, we will be able to see our .ovpn configuration file in the root user’s root folder, let’s move it to the jolmedo user’s folder and assign it as owner.
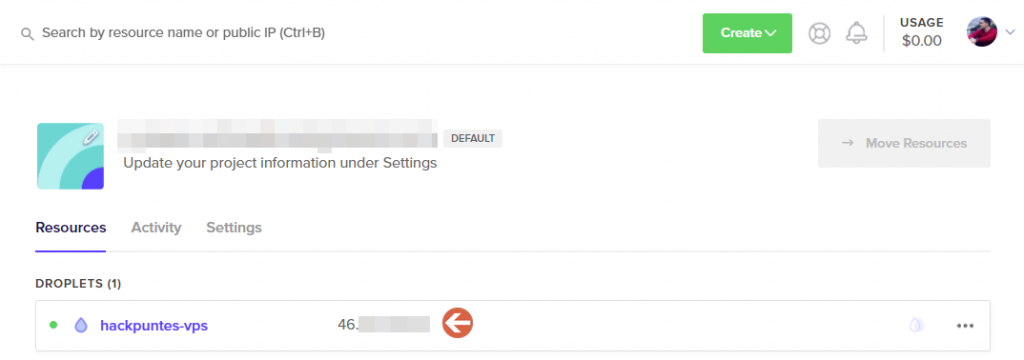
sudo mv /root/hackpuntes-vps.ovpn ~
sudo chown jolmedo hackpuntes-vps.ovpn
Disable logs in our VPN
With everything already prepared, we only have to do a very important thing in the server part, and it is to disable the logs, for it, we are going to modify the following file.
sudo nano /etc/openvpn/server/server.conf
We look for the verb 3 line and change it to verb 0. Now we restart OpenVPN.
systemctl restart openvpn-server@server.service
We now have a VPN that does not actually keep logs.
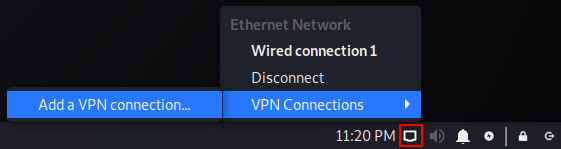
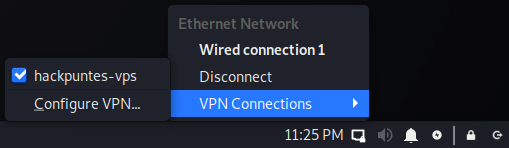
Test the VPN
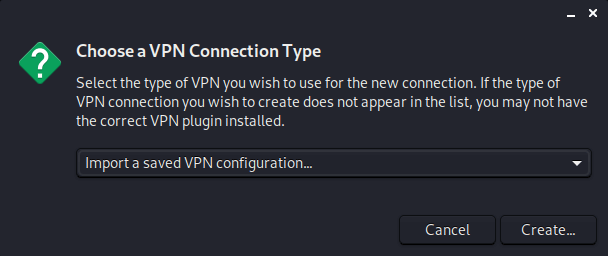
We download the hackpuntes-vps.ovpn file to our local machine and create a new VPN connection.
Choose Import a saved VPN configuration…
Select the file hackpuntes-vps.ovpn
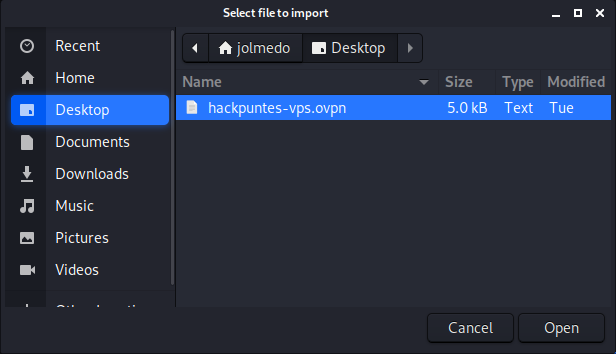
And we will see something similar to the following:
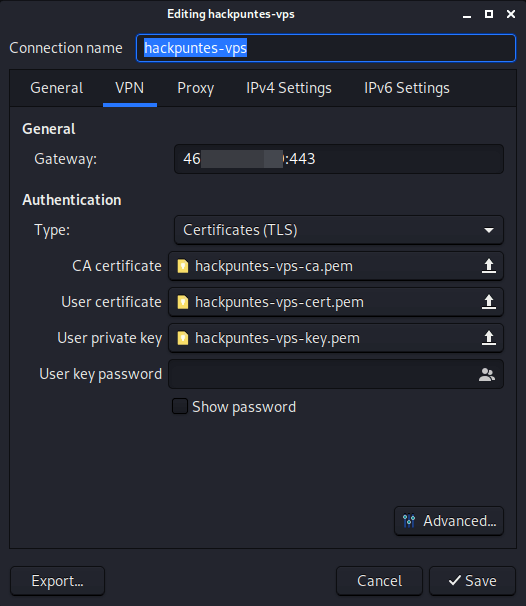
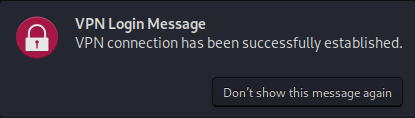
Save the changes and we now have our VPN fully functional and without logging.
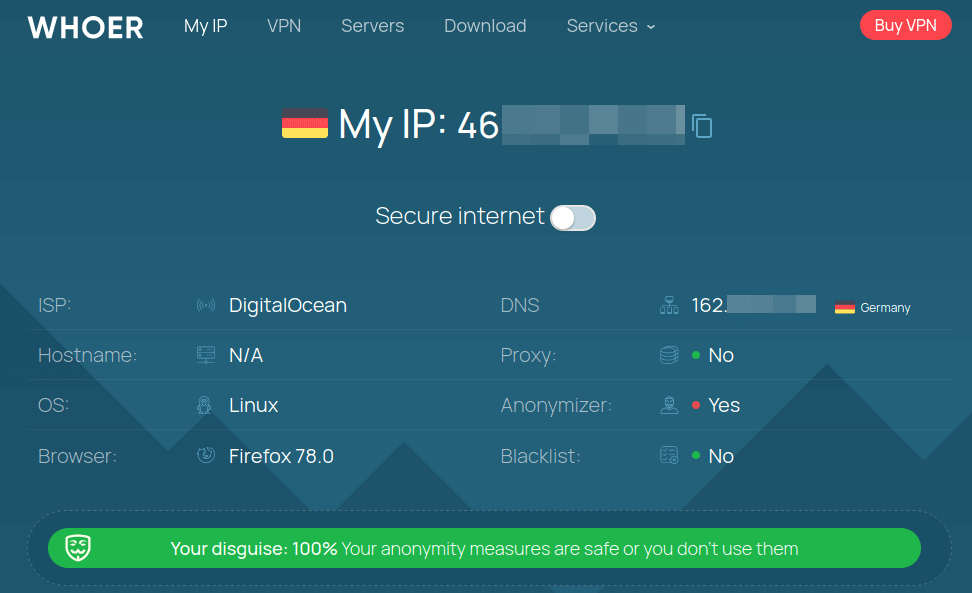
We can use WHOER to find out information and confirm the use of our VPN.